

A standing desk setup checklist is a step-by-step ergonomic workflow that aligns your desk height, monitor, keyboard, and accessories to support neutral posture and reduce injury risk. Getting this right from day one matters. OSHA’s 2026 ergonomics framework focuses on workstation audits and structured movement breaks to cut musculoskeletal disorder risks. The ANSI/BIFMA G1-2017 standard sets the benchmark for motorized desks that accommodate the full range of worker heights. Follow this checklist and you will build a home office that works for your body, not against it.
1. Set your desk height using the 90-degree elbow test
Desk height is the foundation of every ergonomic desk setup. Get this wrong and every other adjustment becomes a workaround.
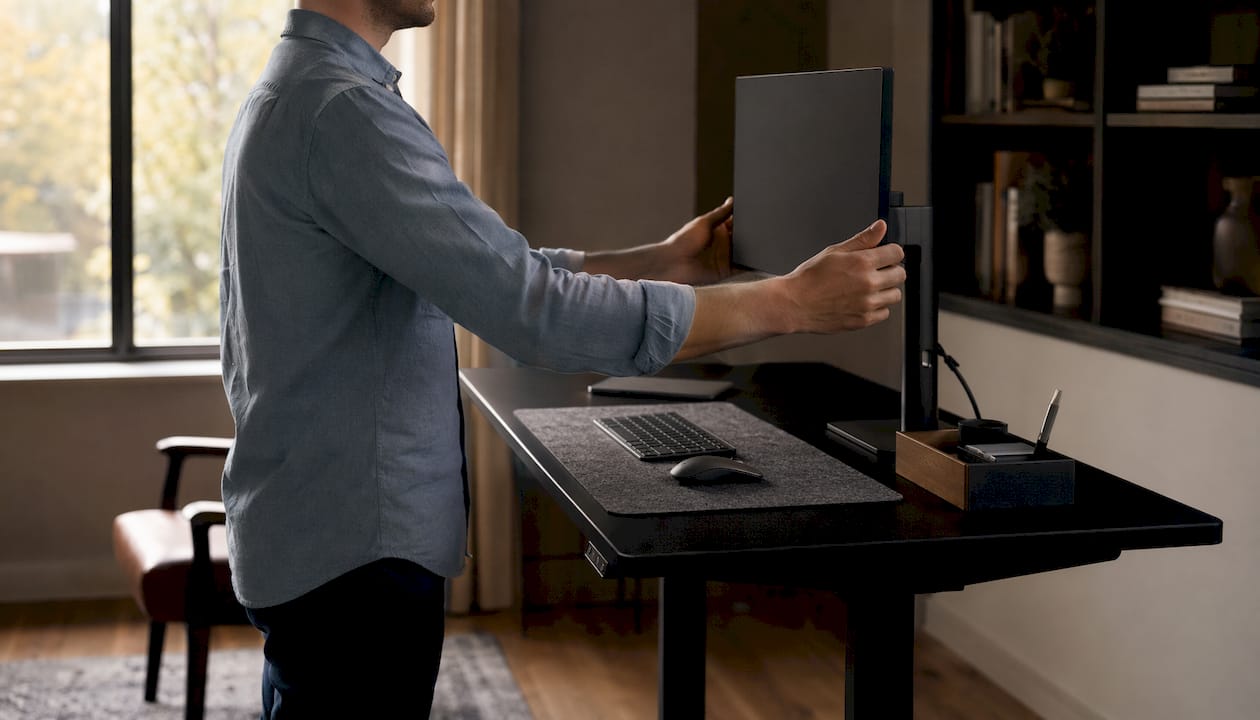
Stand in your normal working shoes and let your arms hang relaxed at your sides. Bend your elbows to 90 degrees. The surface of your desk should meet your forearms at that exact point, with your forearms parallel to the floor. This is the gold-standard ergonomic alignment for standing desk height, and keyboard height typically falls between 38 and 46 inches for most adults.
Two common mistakes undercut this test. First, workers set the desk too high, which forces shoulders to shrug and creates neck tension within an hour. Second, they forget that shoe thickness changes the measurement. Measure in the shoes you actually wear at your desk.
- Measure floor to elbow while standing relaxed in your work shoes
- Set desk surface to match that measurement exactly
- If you use a keyboard tray, set the tray to elbow height, not the desk surface
- Recheck height after changing footwear
Pro Tip: Write your elbow height measurement on a sticky note and attach it to the underside of your desk. When you share the workspace or reset after travel, you will return to the correct height in seconds.
2. Position your monitor to prevent neck and eye strain
Monitor placement is the most overlooked item on any standing desk posture checklist. Most workers set the screen too low, then spend hours with their chin tucked toward their chest.
The top third of your monitor should sit at or just below eye level. Your eyes naturally rest at a slight downward angle, so this position keeps your neck in a neutral curve. Maintain an arm’s length distance, roughly 20–30 inches, between your eyes and the screen. A 10–20 degree upward tilt reduces glare without forcing your neck to flex.
Laptop screens alone are almost never high enough for ergonomic standing setups. Docking to an external monitor and centering the primary screen is the correct approach. In dual monitor setups, center your primary screen directly in front of you. An off-center primary screen causes repetitive neck rotation that compounds into pain over weeks.
- Use an adjustable monitor arm for precise height and depth control
- Center your primary monitor on your body midline
- Dock laptops to external monitors; never rely on a laptop screen alone while standing
- Tilt the screen 10–20 degrees upward to cut glare
Pro Tip: Close your eyes, relax your neck, and open them. Where your gaze lands naturally is where the center of your screen should be. Adjust from there.
3. Place your keyboard and mouse for neutral wrist alignment
Wrist and shoulder strain from poor input device placement builds slowly. By the time you feel it, the habit is already set.
Your keyboard and mouse should sit at the same height as your desk surface, with your forearms parallel to the floor. Keep the keyboard directly in front of you, centered on your body. Place the mouse immediately beside the keyboard so you never reach or extend your shoulder to use it.
- Keep forearms parallel to the floor when typing
- Position the mouse directly beside the keyboard, within easy reach
- Use a negative keyboard tilt (front edge higher than back) to keep wrists flat
- Avoid using the keyboard’s built-in feet, which force a positive tilt and flex your wrists upward
- Consider a split ergonomic keyboard if you experience wrist tension, as it allows a more natural shoulder-width hand position
Reaching for a mouse that sits too far away is one of the leading causes of shoulder fatigue at standing desks. Keep everything within a natural forearm sweep.
4. Build your standing desk accessories checklist
The right accessories turn a standing desk into a genuinely comfortable workstation. Without them, even a perfectly adjusted desk will cause fatigue within an hour.
Anti-fatigue mats of 3/4 inch thickness with beveled edges are the single most important accessory for anyone standing more than 30 minutes at a time. Hard floors accelerate joint fatigue in the feet, knees, and lower back. A quality mat encourages micro-movements that keep circulation active.
- Anti-fatigue mat: Choose 3/4 inch thickness, beveled edges, and a firm but cushioned surface
- Footrest or balance board: Shifting weight between feet reduces static load on joints
- Cable management tray: Under-desk cable trays and cable spines prevent tangling as the desk moves between heights; leave enough slack for maximum height
- Desk pad: Protects the surface and gives your mouse a consistent, smooth tracking area
- Task lighting: Position a light source to eliminate screen glare and reduce eye strain during video calls
Pro Tip: Balance boards are excellent for experienced standing desk users, but start with a flat anti-fatigue mat. Balance boards require active engagement that can distract new users from their work.
5. Manage cables before you start working
Cable management is the step most remote workers skip and then regret. A desk that moves up and down will snag, pull, and eventually damage cables that are not properly routed.
Route all cables through an under-desk tray or cable spine before you use the desk for the first time. Leave deliberate slack at every connection point so the cable can travel the full height range without tension. A cable that pulls taut at maximum height will disconnect or fray within weeks.
Label each cable at both ends. When you need to troubleshoot or reconfigure, labeled cables save significant time. Use velcro ties rather than zip ties so you can adjust routing without cutting anything.
6. Follow a gradual sit-stand schedule
Starting with long standing sessions is the most common reason remote workers abandon their standing desks within the first month. Muscle fatigue sets in fast when you go from sitting all day to standing for hours.
Alternating sitting and standing every 30–60 minutes delivers the best long-term results for comfort and health. Static standing for extended periods causes its own fatigue and pain. The goal is movement variation, not simply trading one static posture for another.
- Week one: stand for 20–30 minutes per hour, sit for the rest
- Week two: extend standing to 30–40 minutes per hour as comfort allows
- Week three onward: aim for roughly equal sit-stand time, adjusted by how your body feels
- Use a timer, phone alarm, or a desk app to prompt position changes every 30–60 minutes
- Move during transitions. Walk to refill water, do a brief stretch, or shift your weight before sitting back down
Experts recommend building over two weeks to avoid the muscle fatigue that derails new standing desk users. Consistency matters far more than duration.
7. Check your posture every time you stand
Setting up the desk correctly once is not enough. Posture drifts within minutes, especially during focused work.
Run a quick body scan each time you transition to standing. Feet should be hip-width apart and flat on the mat. Knees should be soft, never locked. Hips should be level. Shoulders should be relaxed and down, not raised toward your ears. Your chin should be parallel to the floor, not jutting forward.
Locking your knees is the most common standing posture error. It cuts off circulation and creates lower back tension faster than almost any other habit. Soft knees keep the kinetic chain open and reduce fatigue throughout your legs and spine.
Key Takeaways
A properly executed standing desk setup checklist requires correct desk height, neutral monitor and keyboard placement, the right accessories, and a gradual sit-stand schedule to deliver lasting ergonomic and productivity benefits.
| Point | Details |
|---|---|
| Desk height is the foundation | Set desk surface to elbow height while standing in your work shoes. |
| Monitor position prevents neck pain | Top third of screen at or just below eye level, 20–30 inches away. |
| Anti-fatigue mats are non-negotiable | Use a 3/4 inch mat with beveled edges for any standing session over 30 minutes. |
| Gradual schedule prevents abandonment | Start with 20–30 minutes of standing per hour and build over two weeks. |
| Cable management protects equipment | Route cables through a tray with enough slack for full height range. |
What I have learned after years of standing desk setups
The detail that surprises most remote workers is how much the floor matters. I have watched people spend significant money on a beautiful desk, then stand on bare hardwood and wonder why their feet ache by noon. The anti-fatigue mat is not optional. It is the difference between a standing desk you use and one you abandon.
The second thing I keep seeing is desks set too high. Workers assume higher means better posture. It does not. A desk that is even two inches too high forces a constant shoulder shrug that creates neck and upper back pain within days. The 90-degree elbow test is not a suggestion. It is the measurement.
One habit I recommend to every remote worker is documenting their workstation setup. Take a photo of your desk at the correct height, note your measurements, and save them. Standing desks are compliance assets under health and safety regulations, and documented setup training demonstrates that you have actively mitigated injury risk. If you work for an employer, that documentation protects both of you.
Finally, trust your body’s signals over any checklist, including this one. If something feels off after 20 minutes of standing, adjust. Ergonomics is not a one-time configuration. It is an ongoing conversation between your workspace and how you feel in it.
— Kevin O’Gara
The Alto Home’s standing desks built for this checklist
Every point on this ergonomic guide assumes your desk can actually reach the right height and hold it reliably. That is where the desk itself becomes the deciding factor.
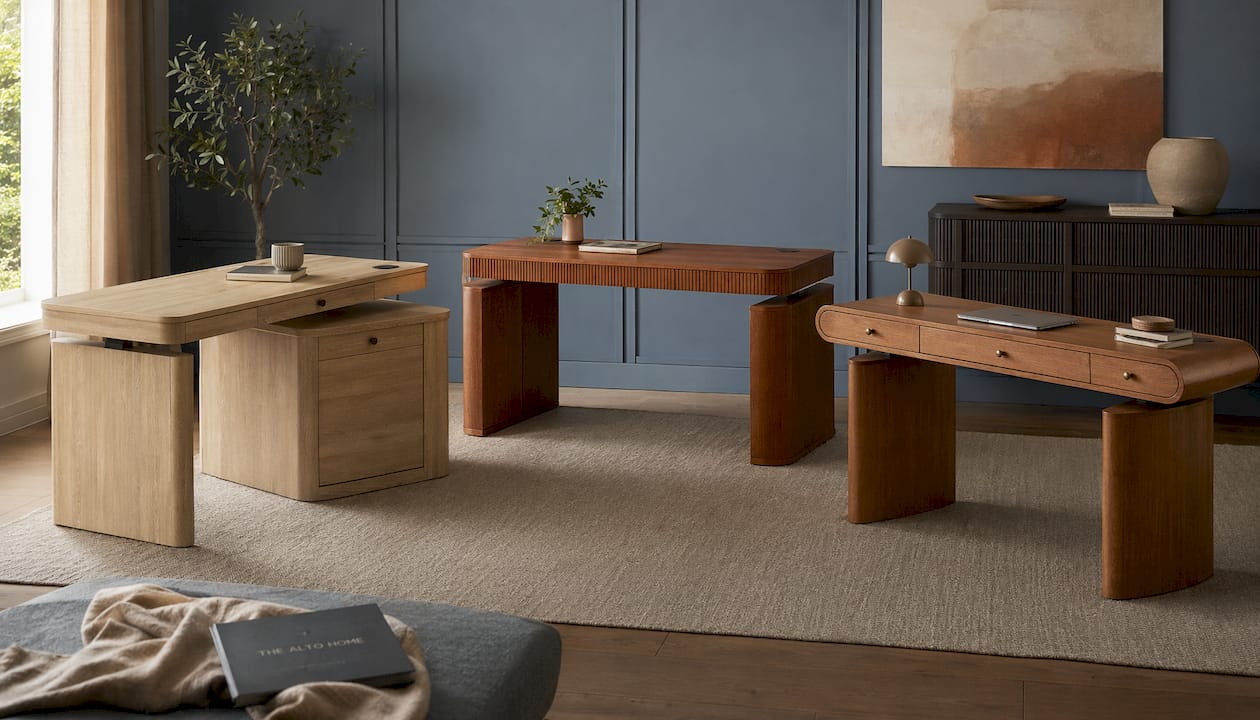
The Alto Home’s Gramercy Fluted Wood Standing Desk is built for exactly this kind of precision setup. Its motorized height adjustment covers the full ergonomic range, and the solid wood surface handles a monitor arm, keyboard tray, and full accessory load without flex. For a workspace that rotates between tasks, the Greenwich Rotating Desk adds spatial flexibility without sacrificing adjustability. The Tribeca Mid-Century Desk brings the same ergonomic function in a design that fits naturally into a styled home office. All three are built to support a complete ergonomic home office from day one.
FAQ
What is the correct height for a standing desk?
Set your desk surface to the height of your bent elbows while standing in your work shoes, with forearms parallel to the floor. Keyboard height typically falls between 38 and 46 inches for most adults.
How long should you stand at a standing desk each day?
Start with 20–30 minutes of standing per hour and build gradually over two weeks. Alternating sitting and standing every 30–60 minutes delivers the best long-term health results.
Do you need an anti-fatigue mat for a standing desk?
Yes. Anti-fatigue mats of 3/4 inch thickness with beveled edges are necessary for any standing session longer than 30 minutes. Hard floors accelerate joint fatigue in the feet, knees, and lower back.
Where should your monitor be when standing?
Position the top third of your monitor at or just below eye level, roughly 20–30 inches from your face. Dock laptops to external monitors, as laptop screens alone are not high enough for ergonomic standing use.
How do you stop cables from tangling on a height-adjustable desk?
Route all cables through an under-desk tray or cable spine before use, and leave enough slack at each connection for the desk to reach its maximum height without pulling tight.
